 Welcome again boys and girls to another exciting AAR. Welcome again boys and girls to another exciting AAR. Myself and winner had decided we'd have a game, I'd suggested we both take lists from Overlord/Atlantik Wall, but when he turned up with a Bridge by Bridge List I instead grabbed my Market Garden list – After all we knew it would be Guards Armoured Recon Vs FJ no matter what! We initially rolled Cauldron, but as that was also the last game we played against each other we re rolled and got Counter Attack. |
Guards Armoured Recon
|
FJ (Veterans)
|
Deployment


Pre Match
Dave
chose his corner and I went opposite pushing the objective as far away from
Dave as possible, hoping my speed would get me there.
Dave deployed first with the Heavy AA on the hill protected
by the HMG’s, his artillery in the corner, one FJ platoon in the woods, another
next to them, scouts on his back edge and StuH’s behind the wood, the Pak’s
were in Ambush. I tried to get his thoughts on this
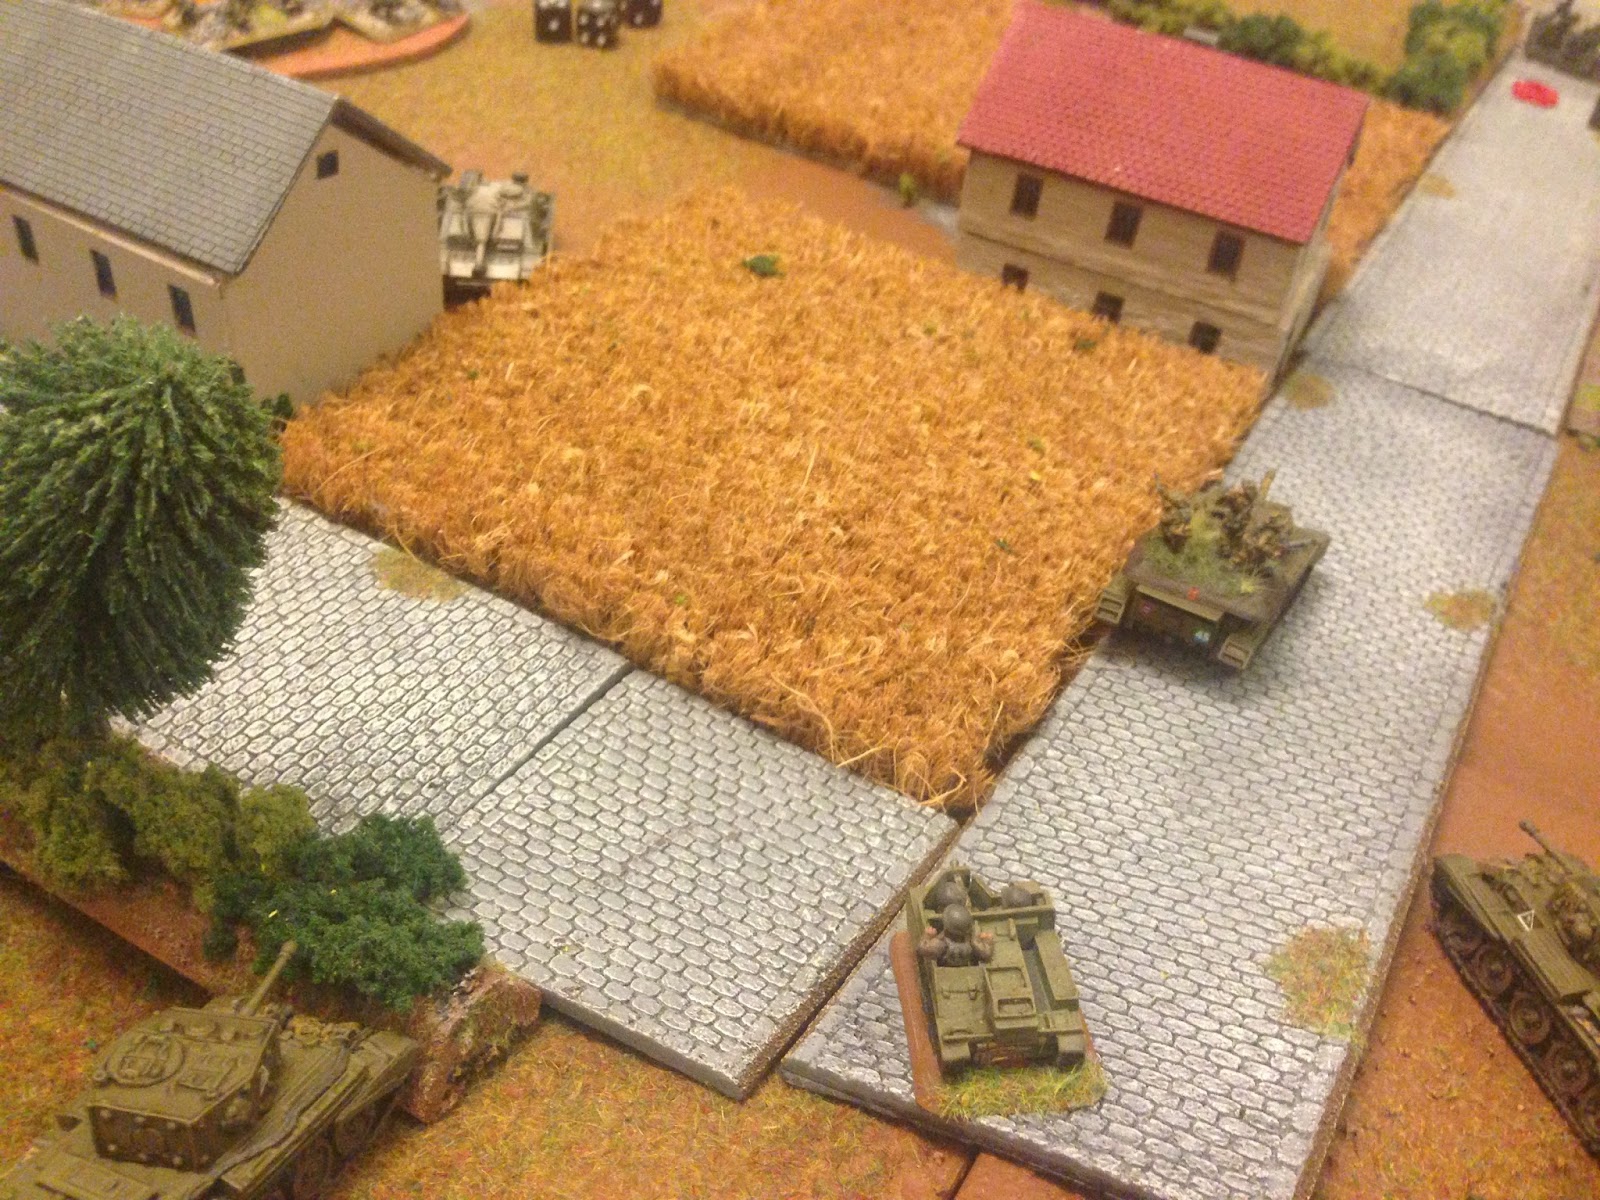
I realised I could get a decent recon move, and so put the
UC’s close to my right edges with the HQ and one full Recce Platoon and also
the short Recce platoon. With the artillery unguarded I hoped for a quick kill
and to split Dave’s forces (or at least make him deploy the ambush over there!)


Turn 1
With recon moves done, my cromwells to the right head off to the undefended objective covered by the recon. Meanwhile with his artillery exposed the other platoon head up and open fire on them, killing 1 gun and the platoon commander
Dave moved his StuH’s to counter the cromwells, taking out a challenger. Dave deployed his Pak 40’s in defense of his Artillery and obliterated a Challenger and Cromwell, Dave moved one of his FJ platoons to try and assault, but decided against it. His Scouts continued there march to the objective


Turn 2
Challenger destroys a StuH on my right in revenge – Dave’s stormtropper preventing more being targeted. The 2 sets of 2 cromwells gunned the FJ in the open taking down 5 stands, whilst the lead Cromwell managed to kill one stand from the scouts.
Dave’s StuH’s manage to bail my remaining challenger, whilst his Flak 88’s on the hill bail a Cromwell and destroy another Cromwell. In targeting the platoon, the infantry make there saves – thanks to the Debus rule a 3+ but still 2 stands die. A lone Panzerschrek from dave targets another Cromwell and kills it, forcing the platoon’s remaining tank to flee. Dave also deploys two trap teams to make me scared.


Turn 3
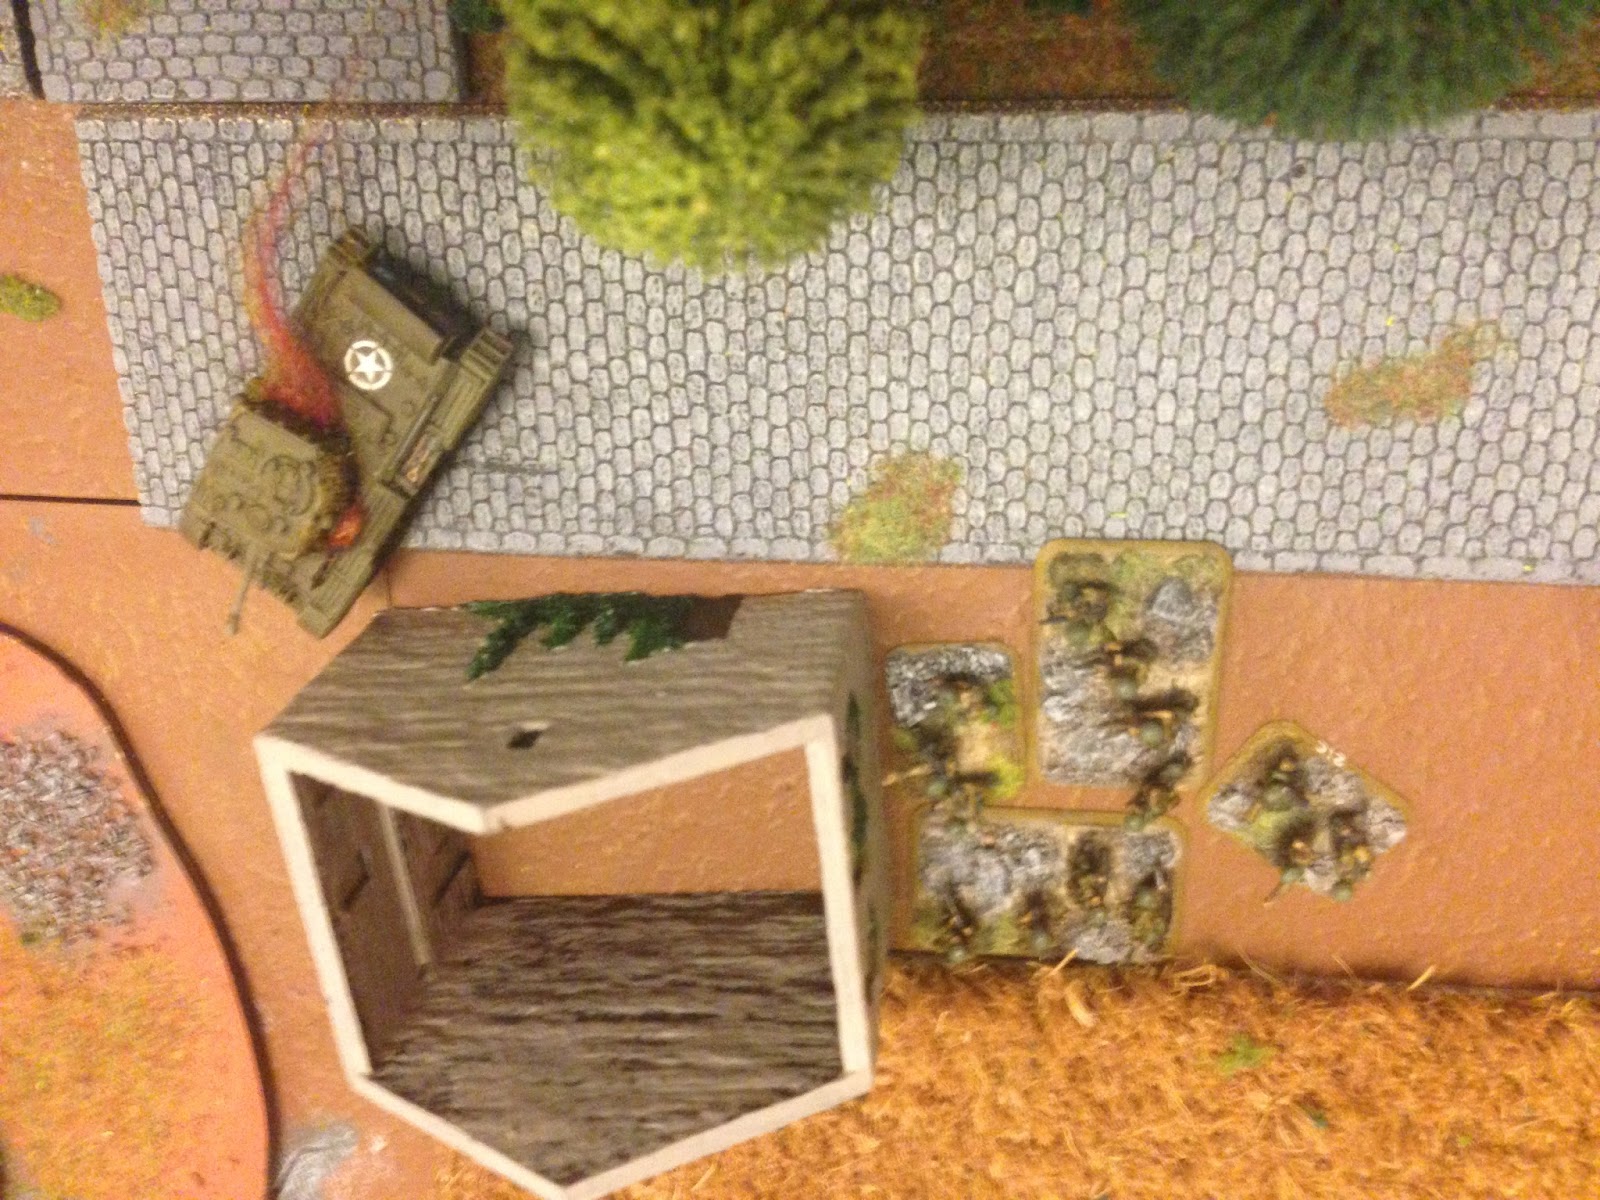
I fail pretty spectacularly with my shooting, with only the IC hitting – and the scouts passing there saving throws! The infantry though assault one of the trap teams and now have the objective – can they hold for 3 turns?
Dave finally begins to realise the scouts alone may not get the objective and moves off the undamaged FJ platoon that way. Meanwhile the StuH’s take out the last challenger, and the Flak’s Bail another Cromwell.


Turn 4
With Dave trying to move more of his force after the undefended objective – I try to make him think twice, but running the 2 remaining cromwells on my left up the middle – however they spectacularly miss the Flak 88 on the Hill! The cromwell’s though manage to take out a StuH and the platoon flee’s. my 2Ic starts to edge round the back of the wood to get to the objective whilst I fail to remount my tanks.
Dave coolly destroys one Cromwell with the Flak 88 – it’s sole remaining tank passes it’s test so dave assaults it to death! The last Trap is revealed and attacks my unsuspecting 2IC behind the wood. The FJ continue there advance.


Turn 5
I realise that if the game goes on much more I’ll loose any way so it’s time for desperate measures. I try to use all my guns to blast away at the scouts and miss – so the infantry assault, taking two casualties on the way in but drive off the FJ!
Dave destroys another cromwell forcing a check which they survive, the infantry take a battering from enemy shooting and fail there morale test. This leave Dave too far
away from the objective I hold, but I’m on a company morale Test – which I pass, winning the game as turn 6 chimes in.


It was a close game and enjoyable using two forces which would have been facing each other in a historical match up. FA6 is very fragile, and 3 Challengers vs 3 StuH’s and being useless otherwise is a lot of wasted points imho. Dave should have moved his other FJ platoon earlier, but that maybe would have allowed me an easier approach up the middle to the other objective?
Great game though!
Good report. No HE can be a pain on the british tanks.
ReplyDeleteit's a tricky trade off, but helps add to the play style i feel
ReplyDeleteIn a way it is liberating when there is no armoured targets and your fireflies/challengers can get stuck right in to assaults.
DeleteReally enjoyed that one, even more so, because as you so rightly mentioned, the opposing forces had a historical 'feel'.
ReplyDelete