Hello All
A few months ago Jeff "Sonbae" Flint did
a post on the WWPD blog about making Battlefront style trees with other sources. I loved the post and had been looking for a reason to make some terrain inspired by it, well my
Vietnam project with Jersey James was all the reason I need so I set about making some Nam style tress.
The range of ready made trees that Woodland Scenics do are great and they have tress for all your table top theme needs, but my first problem was that the range I wanted are not sold in Europe at all, so I had to buy the set I used from the States on ebay. Not a massive problem for me as it was still a good price (about £25 for 33 tress after P&P) and I wasn't in a rush, but not ideal by any means.
Other than the trees the other materials I would use would be cork titles for the base (after seeing Winner Dave's
results with it and his trees), some small round MDF bases to put the trees on (found for cheap on ebay) and lots of sand and flock from a local model railway shop.
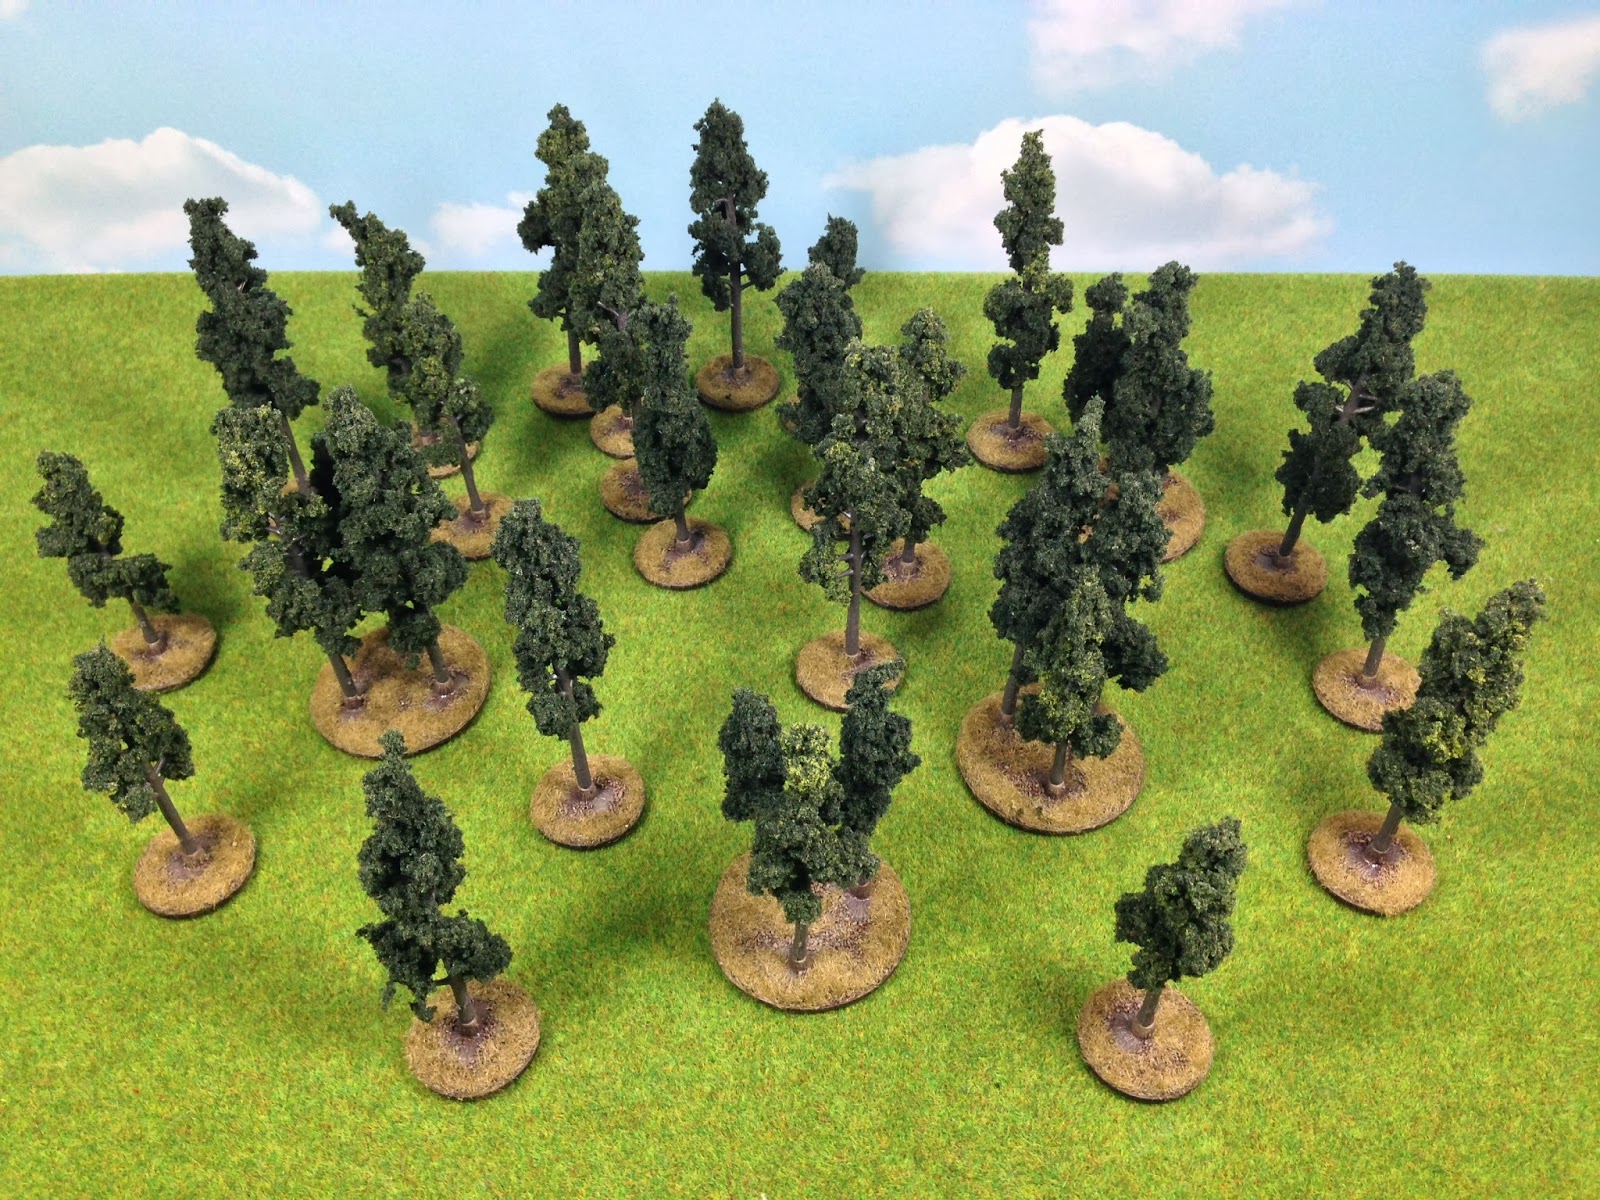
The first part was to get the trees ready to paint and base. I went for the Pine Trees as I thought they looked the closes to trees I had seen in a few Vietnam documentories.
The package is literally bursting at the edges holding in all the trees.
The trees come with a base on the side, this is the main reason I wanted these trees as it meant they would be a lot easier to base and painted up, although the bit of sprue connecting the tree to the base was a pain to clean up on the tree itself.
As you can see below the trees are a good sizes for Flames of War.
Next up after cleaning the bases I glued them all to the round bases I had bought with three trees going on the large ones and then PVA glued some model sand on.
While they where drying I made the bases for the woods. I roughly marked out the size I wanted on the cork tiles and then cut it out.
I found that for round objects a pair of large scissors worked the best as they are easier to manage. When I do some roads later I will use a sharp knife and a ruler for the straight edges.
After that I just PVA glued and sanded the bases as I had with the trees, but this time I used a box to save the excess.
After this a quick spray of a cheap dark brown spray, a dry brush of US Field Drab, followed by a very light dry brush of US Tan Earth and flock and the trees were done.
I have done far more bases, but I couldn't fit them all on the table!
Overall I'm very happy with the results. I want to get another set of trees to bulk out what I have done already, most of them will probably be on large bases of threes to help bulk out the look of the woods.
I'm also toying with what to do next for Nam, either Elephant grass or roads. For the roads I would make my own out of cork titles as I want them to be more bendy and lest structured than the ones Battlefront sell. The Elephant grass is something I struggling to work out how I want to do, I'm torn between, doing it like
WWPD, making little bases with some clumps on or buying Teddy bear Fur. Any ideas?
Until next time, thanks for reading
Ben


.JPG)
.JPG)
.JPG)


Excellent work!
ReplyDeleteI agree well done!
ReplyDeleteMy plan, regarding Elephant grass is to do something similar to WWPD's, which similar to what we did in the studio (basing them on small bases). I'd like to base them as well. However, the Teddy bear fur has potential. Perhaps a hybrid?
ReplyDeleteI have toyed around with the way WWPD did theirs, I have a spare door mat that I was going to turn into a wheat field, but a hybrid idea has some legs... I will have a think after the summer when we go back to Nam.
DeleteBen