Hello, Dave here, i've finally finished the new plastic T34s, they're pretty darn awesome, here's how I did it...
As soon as they were available I ordered 2 boxes of these beauties, i'll probably end up checking out most if not all of the new plastic box sets as they are released so stay tuned, in the mean time...

As soon as they were available I ordered 2 boxes of these beauties, i'll probably end up checking out most if not all of the new plastic box sets as they are released so stay tuned, in the mean time...
As expected I took longer than I could have to assemble the tanks, by breaking the task up into small chunks....the good news is I have 10 assembled T34s with 2 turret variations and the weekend is looming. I didn't particularly enjoy the mudguards or fuel tanks and I had hoped to keep the tracks seperate, but that would make gluing the mudguards on impossible. 5 have rounded mudguards and 5 with the square ones...nice. All in all they went together very easily and I'm not adverse to doing it again in the future.

Quick nod to Dirty Jon for recommending this product. It's freakin awesome. You will sacrifice a paint brush, but please believe me it's worth it. So much better than regular plastic glue. You hold the two bits to be glued and paint the weld down the seam. Couple of seconds later, you've got a bond, 24hours later the plastic has been melted together. Honestly...try it, it's so much easier and quicker than regular glue.

Ben popped round last night to give me a quick ass-whooping. So here's a few comparison shots. The green fella is a PSC offering painted by Ben's fair hands.

Slightly longer in the body and more fuel tanks

More detail around the gun mantlet? The body appears higher with and increased angle on the PSC one.

Quite a bit of difference in the wheel design.

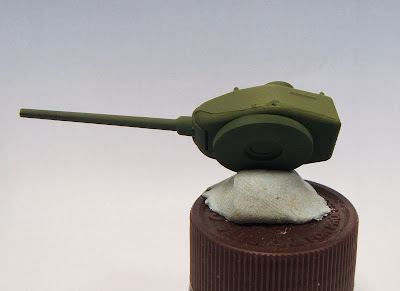
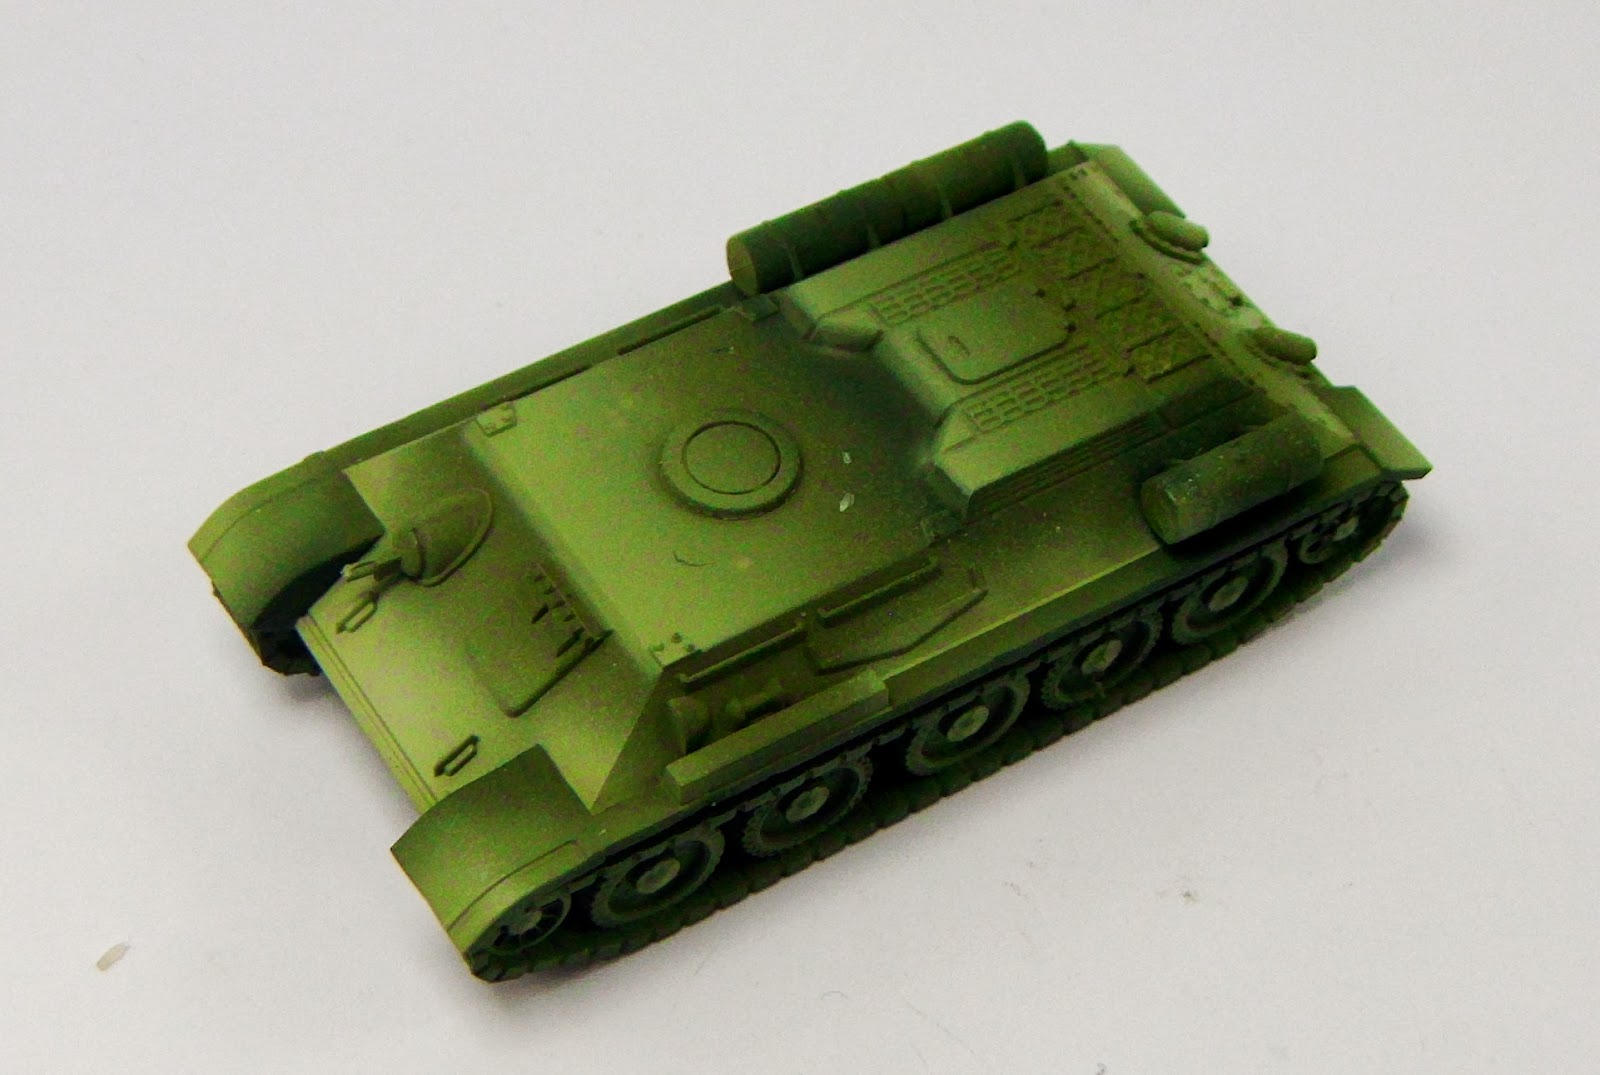
On to painting...well after a little bit of cleaning up. Ahhh a beautiful sight, constructed and primed tanks.

I haven't shown you them base coated, I bought a fresh pot of Tamiya's Nato Green. When I open it up the first thing I do is top it up to the top with thinner (I use Mr Sticky's). Then give it a really good mix. I find this gives me the perfect consistency for airbrushing tamiya paints.
After basecoating I switched to Tamiya's Balck Green. A great colour for adding shadows, this is a quick and fun step, just free hand it, there's lots of time for corrections.
Underside of turret and barrel...
Backs of wheels...

Front a rear bottom glacis


Innerside of mudguards (most important), along the middle join and round the petrol tanks
We've had some fun, so it's time for pain...masking lots of masking. This does take a while, a cocktail stick is your friend. The key to tanks like this is the front glacis plate. I think about that and plan out from there. Now the modulation can begin...some prefer a number of colours, I don't. I like two, green and white, then I mix them.

First highlight...always subtle, very subtle (5 parts green, 1 part white). This is for use only on the big areas, so sides of turret, centre of barrel and sides of tank. Don't bother with the top of the tank or the top of the turret, you'll do more harm than good.

We won't need this mix again, so add another pipette (or your preferred measuring device of choice) of white. This should be a big step and we want to keep this mix for detailing later.

Continue by adding more white to some of the above mix, you may need a few drops of thinner to keep it flowing nicely. Make sure to move spray a much smaller area than the last two sprays, this will form the top highlight for the smaller panels, they won't take any more.
Looks like some freaky snow camo doesn't it...

Next I'm going to focus on the wheels, by using the mixes I saved above and zenithal highlighting. As I do it, paint will get on the edges of the previously masked mudguards, highlighting them.
Actually I'm taking a break as the fumes are doing my head in and I promised my daughter we'd going ice skating.
Wheels and mudguards done, and I moved on to making this template/mask before the boys turn up to record our next podcast. This is for the much neglected top. At this stage i'm realising how much work there is to do on these, they are much more complicated than a T70 or a KV1, lots more angles to work with.

The tops are done, but I need to do some tidy up work where the top meets the front glacis. I always was going to do this anyway as it brings lots of contrast, this is why I kept some of the original colour. The graininess is mostly due to my camera...Ben come back with your iPhone's awesome lens...
Here's the result of the clean up process, tidied up the line between top and front glacis, plus I went around the top of the turrets.
Next I'm focusing on the details, by this I mean hatches, the bulb things at the rear of the turrets. I'll mask up or create a template from card, then reapply the original colour and then modulate in the opposite direction.

I finished the modulation, one thing I've discovered is that I really need to get my 0.2 needle set in action, the 0.4 covers too much area. The other thing I learned (again, despite George always telling me this), is that I need to paint one up first as a test model, then play with it until I'm happy with it. Then again I'm never happy :)

As i've modulated to near white, I need a lot of layers of filter. I've done about 6 coats and left it thick in some areas to start the weathering process.

...and black lining...

I followed all the previous steps to weather them, you can read them here
 Another step I'm adding is the use of pigments, I've not used them before...but here goes.
I followed my usual method for weathering, which you can read here, but I felt inspired by battelfront's article on blending in
Without further ado, the results...
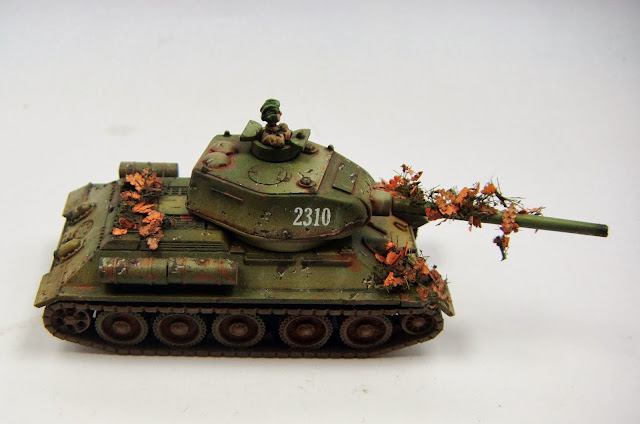


 Ben and I had a conversation about diminishing returns, with regards to painting. It's taken me 2 weeks to get these done. I don't know if it was worth it or not, I know I want to get better as a painter/modeller, hopefully the speed will come with it.
Thanks for reading, feedback is welcome, I'm keen to know of people think I over weather stuff, if I've used too many leaves or not enough, do I take the modulation too far etc etc
See ya
Winner Dave
They look fantastic! Well done.
ReplyDeleteHey Mike thanks a lot. I'm at work and there's no managers about so I'm catching up with some of your aar :)
ReplyDeletePainting wise these look fantastic. Think the leaves are too much though. Perhaps tone them down by 1/2 of what you've used?
ReplyDeleteGood stuff Dave.
Thanks for the feedback Dai, next batch i'll do just that and see how it looks. However putting them in and out of the carry case will soon achieve the same effect :)
ReplyDeleteExcellent work Dave, they look fantastic! I'd be interested to hear some thoughts on adding foliage camouflage to tanks too as I think they add as much to the overall effect as the excellent paint job!
ReplyDeleteIt's a freakin nightmare, took me ages and glue goes everywhere, plus you have to add it a little at a time. I wanted to try it out though.
DeleteThey look really good, but I will say that I think the foliage would look better it there was more of it, it is a little thin maybe.
ReplyDeleteMore as in, more areas on the model or thicken the existing areas? Thanks for the feedback.
DeleteIt either needs to all go or more areas on the model need more.
DeleteWas the point to camouflage the tanks or to make it look like it just drove through underbrush? Because if it was for camo than I think they would have done the sides and top too.....
Gulp! In all honesty I didn't think about it like that...my angle was, waa-hey i've got some mininatur leaves, let's stick em on and see what happens :)
DeleteSomething to think about there Mr T, thanks for the question, next time I'll look at some photos of tanks and try to emulate.
I don't want to criticize, I think that putting leaves on is a really cool idea, just want to give some constructive criticism.
DeleteMost def, appreciated...have a good Christmas dude.
DeleteYou too!
DeleteGreat paintjob
ReplyDeleteNice job on these. The colour modulation looks fantastic. I can see what people mean about diminishing returns though. On the tabletop, you don't necessarily see a huge difference between tanks with colour modulation and weathering and tanks with a basic paint job. It makes a difference though if you want the best looking tanks when viewed closely. In my opinion, I paint to improve my skills and try new things, not just to have models that look good on the table.
ReplyDeleteFoliage-I am torn. I like foliage but sometimes I think it obscures a great paintjob like this. It does add some nice colour though. I have this same dilemma with my Panzer IVs.
Thank you Cameron, your PzIVs are awesome sauce. I've got half a box of these leaves left. So I could do another platoon, or I could save them for use in terrain pieces...which I think would be really effective.
DeleteI'm with you, as soon as I see a new technique I just gotta try it. If it hadn't been for a youtube video on "wet blending" I'd never had made that fateful step into our local GW store :)
I'm the same. I very rarely paint two platoons or batches of models with the same techniques. I figure I would rather evolve my painting than have a totally uniform force.
DeleteThese T-34s look really fantastic. I like the dramatic colour modulation. I am going to have to try filters more. I just dislike the drying time between layers and need to find another place to easily get AK Interactive filters. What colour is the paint itself in the filter you used on these models?
I hadn't realised you weren't using filters...just goes to show how smooth your airbrushing is. I can't seem to brush without getting splattering.
DeleteAnyway the filter I use is a Mig filter for AK interactive, AK-076, it's brown for green. Thing is when this runs out I'm going to my local art store to pick up some oils and try just using them instead...maybe a Dark Ochre.
I also want to try out that effect where you put a dot of red, green, blue, black and white, then use white spirit to blend them together...that looks like fun.
Cameron, Dave,
DeleteIn regards to the AK. I am going to try ammo by mig. All the products on Ak were out of stock last time I looked. But looking at migs new company ammo the products are virtually name for name.
I would love some official clarification from either side would ease my fears of being able to do a restocked when my favorites start running out and some holes I have.
Nice review, and some excellent painting to finish it off!
ReplyDeleteCdlT
Winner these are beautiful! The modulating effect blew my mind
ReplyDeleteThank you guys...it's really appreciated.
ReplyDeleteI'm behind the times, but these are simply fantastic. I've been modulating my own 15mm soviets, but settled on a far lower standard than your own on account of wanting to complete a very large collection, but you do set the standards high for trying the odd display piece. Thanks for the inspiration!
ReplyDeleteWho makes that foliage?
ReplyDeleteSorry bud, hadn't spotted the question until now...MININATUR / SILFLOR is what you're after. http://www.antenocitisworkshop.com/
DeleteHas a very good stock of them, but I don't think they have these exact leaves, which I found on ebay.
Bloody hell, I thought I could paint green well, but I feel like a total amateur now. If these guys are going to be at Corrivalry, I think mine may be hiding in shame.
ReplyDeleteI'll be hiding with you, I've had a sneak peek at Steve's Sherman's...they've blown my mind.
ReplyDeleteThanks for the comments though Paul, see you in a couple of days :)