 |
| Wrong Cromwell... |
up to the Midlands, this is halfway across the country, or if you are American, the distance to the shops. Anyway, I'm no longer near Ben and Adam and Winner, but I am now near Steve Charlton, the UK number 1. So the plan is that Steve will show me what I'm doing wrong with the various armies I can't get to work for me and show me how to do better with it. I then write it up so that it's not just me who benefits from Steve's expertise.
Cracking idea right?
Anyway, one autumn evening I made the drive to a secret location in the middle of nowhere to Steve's top secret lair with my Desert Rat Cromwell list. If you are a long time fan then you will know of my love/hate relationship with the Cromwell cruiser tank and my ability to screw up with them in pretty much any situation.
So I put together an 1800 point list (in keeping with this year's Corrivalry points) using the desert rats armoured squadron from overlord and Steve put together a HitlerJürgend SS infantry list for them to beat up.
My list was:
1&2IC - 2x Cromwell IV
Desert rats armoured platoon - 3 Cromwell IV's, 1 Challenger
Desert rats armoured platoon - 3 Cromwell IV's, 1 Sherman Firefly VC
Armoured Recce platoon - 3 Stuart V's with AA MG's
Anti tank platoon - 2x M10 17pdr's
Rifle platoon 50th so confident vet
Field battery (SP) - 8 sextons
AoP
Steve took a selection of things which I can't entirely remember but mainly consisted of two large blobs of infantry, 4 StuG's, some 10.5's, some PaK 40's and some recce.
Steve's secret bunker has a gaming table upstairs, so we climbed into the ceiling to find the table set up, waiting:

We decided to play surrounded (as it's one of the many missions is struggle with with cromwells), and agreed that the river would be fordable but slow going and require a bogging check (we'll touch on this later).
Steve set everything up except his ambush in the middle ready to get crushed beneath my tracks.
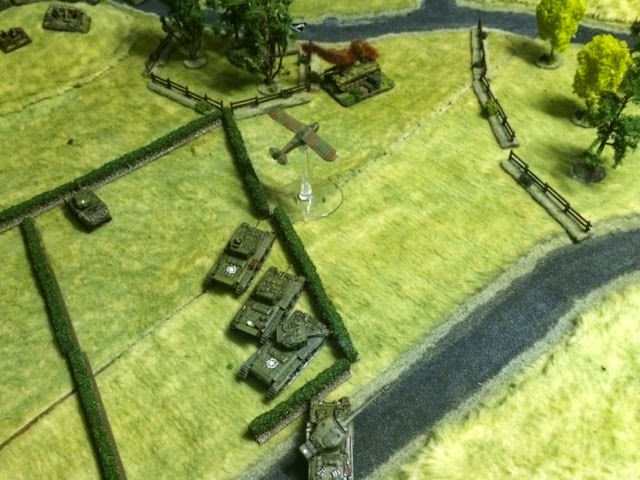
I then set up with my tanks split one on the riverbank, one behind the hill on the diagonally opposite corner in order to threaten both objectives. The infantry set up to ford the river and take cover in the woods ready to push on when things had been softened up by the tanks. The sextons deployed behind a hill and the M10's took aim for where the StuG's were. The recce got ready to push forward and start lifting gone to ground.
Then Steve took a look at it and pointed out all the flaws, which is why there aren't any pictures of it. Steve pointed out that I was splitting my forces badly and would be better placed concentrating on one objective rather than doing a half hearted attack on both. He also suggested that it would be better to use the M10's as an area denial tool on the far side of the river where they had a wide line of sight and could stop the StuG's coming out to play. He then let me follow his advice so the set up ended up like this:


 |
| Add caption |

 | ||||||
While the SS Recce pushes towards the vulnerable left hand objective.
So, the rest of my turn continues, the other Cromwells push forward, as do the Stuarts while the Sexton's smoke the PaK 40's to reduce the chance of my tanks being reduced to smoking hulks before they get a chance to do anything.
Finally, An opportunistic bit of shooting takes out one of the SS Recce while bailing the other two, who promptly run off (they failed their disengage check)
 |


So, things went quite well for me when Steve tried to move the StuG's into position and bogged 3 of the 4. No chance of an improvised recovery vehicle here and Steve kept the final StuG hidden and still to avoid making things worse.

To minimise the downsides of this turn of events, Steve smoked my Sextons and 2nd Cromwell Platoon.

So after a pretty lucky (for me) turn 1, I had to try and turn luck into success.
The 1st Cromwell Platoon stayed still and opened fire, while the 2nd Platoon moved the two Cromwells out of the smoke while leaving the Firefly and last Cromwell behind to maximise their fire rate to try and kill some StuG's who had got the wrong sort of leaves in their tracks. This also had somewhat limited results but did bail a StuG.

Another smoke screen came in to try and cover the PaK 40's, but the second one moved to cover the Left hand side SS in order to stop them destroying the second Cromwell platoon and the Stuarts.


Steve then had a slightly delayed revenge strike. This bailed a lot of Cromwells and smoked some as well. At this point it appeared neither of us could kill anything more crunchy than a half track.


My infantry waited their time in the woods...
 |
| The bombardment begins to take it's toll and kills a PaK 40 |
 |
| One StuG dies in the least competent firefight I've seen in quite a while |
 |
| As does a Cromwell, annoyingly the command Cromwell for the 2nd platoon. They aren't moving any more... |
 |
| Dead StuG's, in what is probably a metaphor for this whole game. |
 |
| The PaK 40's finally died, things started looking up, The Cromwells could move in (once the pesky Shrecks had been sorted out anyway) |
 |
| The Cromwells keep shooting (and bailing out) |
 |
| While the Sextons make the SS keep their heads down |
 |
| And the Stuarts join in from the rear. |
 |
| The infantry on the Right hand side start moving to back up their chums... |
 |
| Who really need some back up at this point as the British start deploying the Kitchen sink |
 |
| Here comes the reinforcements... |
Which they did, finally clearing the objective, but too late for me to be able to take it without having to fight off the newly arrived infantry, who promptly scragged the M10's and with a little help form the 10.5's the 1st Platoon of Cromwells.
 |
| And the Cromwells start to die |
 |
| While the bailed M10's and Challenger find themselves in a sticky situation. Then die. |
 |
| With the tanks dead, the Poor Bloody Infantry realise they are going to have to do the job properly and assault the SS, killing most of them as the surviving Germans break off. |
 |
| The British Infantry consolidate after the assault to contest the objective, in the open, on a hill, with lots of German guns targeting them. |
 |
| and then they ran away after the storm of fire which kills most of them. Probably not the most cautious of moves that one. |
I'm not entirely sure how I won this game, and think that in reality, Steve beat himself here, aided by some pretty appaling luck with the StuG's.
 |
| The left hand objective just before the company ran away |
With regards to my list, Steve said it was pretty good, but it would be better with 4 less Sextons and something better instead, possibly a breaching group in order to be an auto attack list (important as it is a pretty poor list to defend with). He also suggested swapping out the infantry for more M10's to make a better anti tank option.
As general tips to using the list (and on Flames of War in general) we talked about the importance of keeping platoons alive and fighting, this linked back to the use of improvised recovery vehicles and sacrificing 2iC's to keep platoons functioning. After all, you only fail company morale checks if you actually have to take them. If your army is alive, it doesn't need to worry about running away.
In terms of winning the game, Steve explained that it is not about killing the enemy, and that you have to play to the mission. That meant in this game it made a lot more sense for me, as a mobile army, to target one objective hard, rather than make a half arsed attack on both objectives and Steve's whole army. It also meant that when I had worn down the original defenders, Steve didn't give up, he anticipated it and fed the reinforcements in at exactly the right time to really annoy me.
Steve also pointed out that bringing up the sextons to use as assault guns was a sensible move, but I had been a bit uncautious with my placement and he was in position to use some AA guns to shred them if he hadn't failed the company morale test, which would have put me very close to a company morale test myself. Again, even when you are going for the kill, try and keep your guys alive...
That's it for this one, we'll see what happens with the next awful army I ask Steve about using, my Late war Stuart Horde is one I'm thinking might need some help...
 |
| Steve being good at Flames of War |
Very interesting article with so.e good tips. I'm interested to read your series with different armies. Lots of good tips. I need to use recovery more myself.
ReplyDeleteNice post, some wise words in there for all of us!
ReplyDeleteInteristing use of the Improvised vehicle recovery, did you use this to move both the bogged and improvised vehicle recovery across the stream? if yes did you make bogging checks again for each?
ReplyDeleteIf not although in the rules page 45 it sounds correct but is it actually within the spirit of the game or something you would try at an event?
In the example it has a recovery vehicle removing a tank from a hedge not both of them going over it.
An interesting read and good game summary. It seems to perform the tow depicted in the pictures, the 2IC would have to make a bogging check to enter the stream during its move to position itself at the front of the bogged Cromwell, and then roll the skill test for improvised tow vehicle, followed by a second bog check to pull the tank through the water to the opposite bank during the shooting phase. 2 moves (movement & shooting phases) within the river so 2 bog checks. That would align with the recovery vehicle rule about bog checks when towing if it starts in rough terrain. They didn't discuss that aspect in the rule analysis. Another rules point is if a vehicle bogs down halfway of its length into the rough (pg. 44) and you have a narrow river and a long tank (like a Challenger) it would be possible the towing vehicle would start its tow on dry land and not have to do the second bog check. Makes sense according to the rules. I look forward to learning more from Steve in the future!
ReplyDeleteDon
Can you give rule reference to the requisitioning rule?
ReplyDeleteI found on p105 about bogged/bailed command taking over another platoon tank but you are describing the reverse situation here...