Enjoy!
Winnerski
[14-03-2015]
Today I start this year's project, which is my EW Polish army. Because of the way I paint, I'm most efficient if I combine similar models, so I'm doing all the armour assets together...which includes the train...yay!
Unfortunately my enthusiasm quickly waned, as the train did not want to go together nicely and I'm left with a fair bit of filling to do. At least its just the loco, the carriages seem fine.
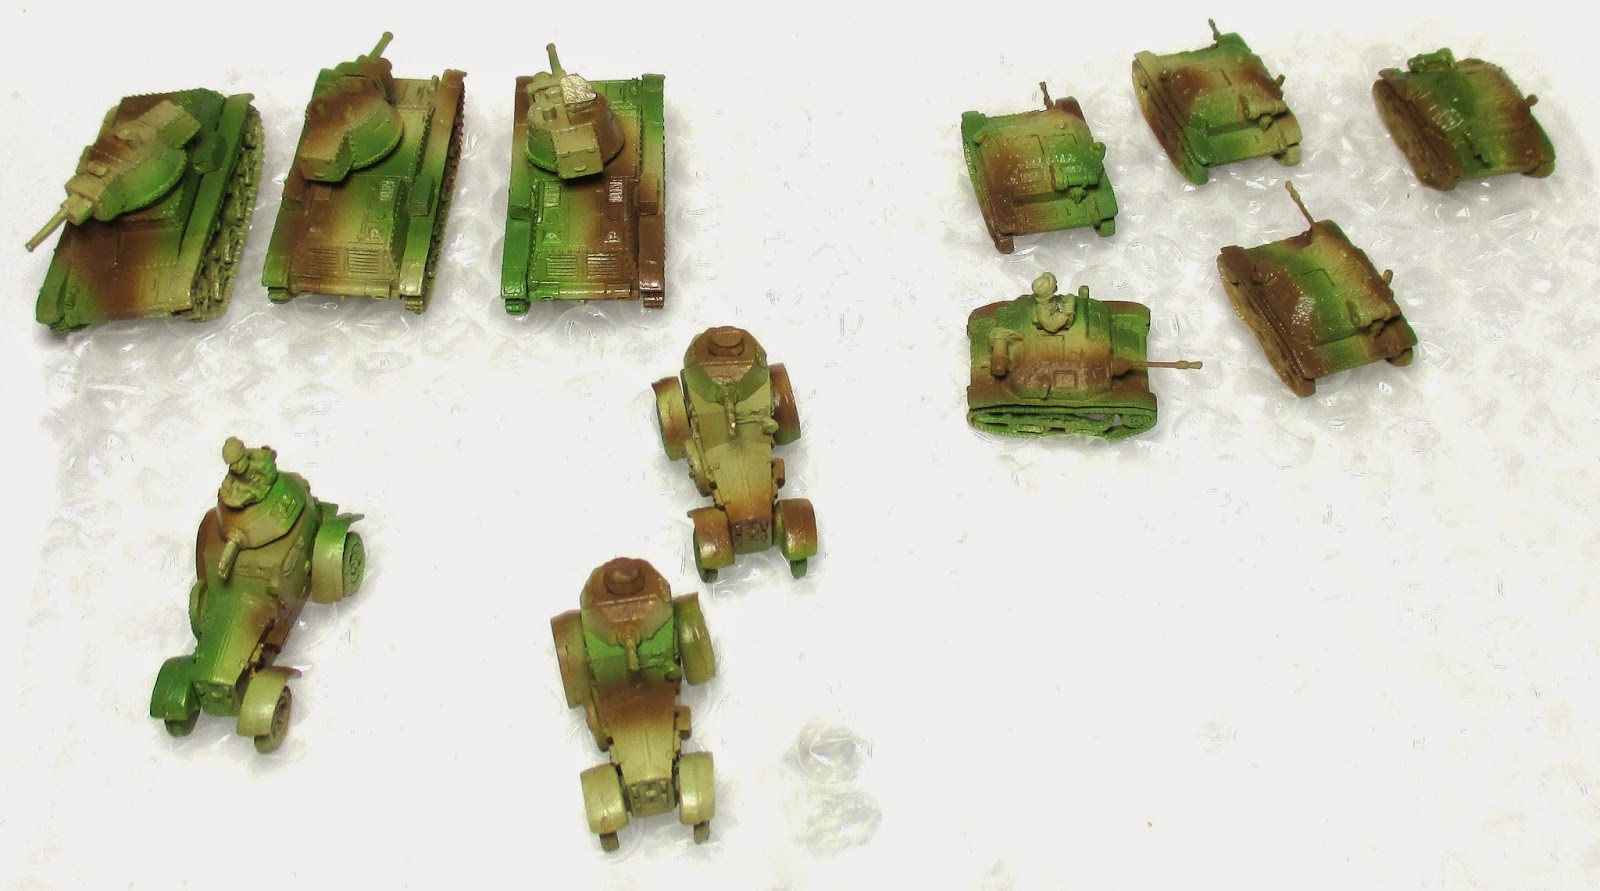
Not a bad day's work though, one train, three armoured cars, three 7TP tanks, and 5 Tankettes. I own an assortment of rare earth magnets now, which is really handy as you can easily adjust for each turret. I have some that are thinner and some that are thicker than the standard BF issue sized magnets. Right now everything is soaking in soapy hot water.


[15-03-2015 - 16-03-2015]
I primed the units with Vallejo Parched Grass surface primer. It was too dark for what I had envisaged so I over sprayed with Khaki.


[17-03-15]
I panel highlighted by adding ivory to Khaki.


[18-03-15]
More ivory to the khaki/ivory mix and I'm done with this colour...unless I need to make touch ups later on.


[19-03-15]
Big scary step today, adding the green. As you can see I've chosen a very bright green, which I was kept deliberating in my mind over and it's hard to see what effect I'm going for here, but don't bail on me yet :)
As I was rediscovering my golf swing (which is ninja in case you're wondering) today, I didn't have time to do the rest of the armour.

[21-03-15]
Didn't get any painting done yesterday, sacrilege I know. Anyway, today being Saturday but also the Six Nation's final means I should get a fair amount of painting done.
So first I need to apply the green to the rest of the armoured assets.

So here, I've made the centre of the green darker (German Cam dark green), which is the reverse of highlighting...lowlighting? highdarking? I actually screwed this up and made the centre too dark, ,so I've over-sprayed with the original colour (German Cam Bright Green) to mute the effect.

I got it right first time on these fellas

Time to add some brown, I use VMA pale brown, which came from the Japanese colour set that I slated.

You can see I'm having to re-glue magnets fairly often.

I managed to find the time to add a darker brown (VMA Pale Brown with Flat Brown), and this draws to a conclusion the airbrushing stage.


[22-03-15]
Not much work done today, but I did manage to get a layer of filter over everything. I always think this step is going to take longer than it does. I'm glad I kept the filter thin and didn't over do it, which is a common sin of mine. I think at least another layer is called for.


For no reason whatsoever, airbrushing and filters are often associated with each other, I think it's just a development step people go through...I want to be a better painter...I must learn the airbrush...now I must learn filters. Well, I'd encourage anyone to use filters, whether you airbrush or not. A filter is like an awesome wash...that doesn't do it justice because I actively discourage throwing brown acrylic washes on tanks...I can't stand that look. A filter does what a wash is meant to, tie the colours together and add a level of realism. It doesn't do what a lot of people use a wash for, which is profiling...that'll be the next step. Using filters does require some additional expense, as they are typically made from enamel, you'll want to buy odourless thinners, some pipettes for mixing and moving the filter around, some white spirit (mineral spirits) for clean up and some flat brushes for application.
[23-03-15]
A second layer of filter...here I made a mistake, in that I didn't cover my models over night and got dust on them...dust & filter = ickiness.
Can't decide on a third layer or not...will sleep on it


I went with a third layer on the train, but not on the armour. Then I applied gloss varnish in preparation for black lining...which I'm not looking forward to.

[25-03-15 -> 28-03-15]
Progress slowed to a crawl during this very necessary very tedious step. Black lining, is just one method to profile your models, I use an enamel wash and am fairly sloppy when applying it. The time is spent in the clean up of the wash. I find this step makes a huge difference to the model, and darkens the model a fair amount.
If you look at the engine here and compare that to the shot above, you get a good idea of what black lining is bringing to the party.


[04-04-2015]
Progress is now grinding along at a snails pace. Job interviews, families for Easter, golf lessons, playing some games...life. But today I managed to find the time to do some edge highlighting. I used Iraqui sand as that seems to work well across the tri-colour.

This is it for the train for part 1. I now need to edge highlight the tanks
[18-04-2015]
Finding time to paint has been impossible, I can't remember the last time I went this long without painting. Unfortunately the longer I leave it the harder I find it to get going again. Anyway today I cracked on with edging the tanks...bit rushed.

So time has gotten away with me and I've found myself dipping in and out of painting. I decided to focus fully on the train in order to get something finished.
So without further ado...here she is.


Painting the eagles was quite good fun, nice to paint something quite specific.

Unfortunately I had my first disaster with varnish, it came out all foggy and made the train look really bad. I applied water all over it, but that's lead to some terrible tide marks and pretty much washed away the pigments I'd used to weather the lower sections...very annoying.
I'll have to do some remedial work sometime, but for now you can only see the problem ares if you really look for it.
Next post I'll have the rest of the armour finished off.
Dave
The train looks nice. Sorry to hear about the varnish trouble. The bold green and brown looks good. I'm interested to see it all finished. Edge highlights are so slow!
ReplyDeleteMany pictures don`t work, is this just my browser or a general problem?
ReplyDeleteThey all look there to me atm.
DeleteMust admit I had a few issues myself over the weekend, so might be a problem with the blogger software....try mashing ctrl+F5 a few times.